Showing posts with label lip balm holder. Show all posts

Friday, November 2, 2012

Someone Will Always Need One

My humble roots, chapstick necklaces inspired by a gift that a friends mom made. 
The gift and the friend will always be remembered.

Below is a tutorial on how to make the above necklace:

Thursday, August 2, 2012

It Doesn't Get Better Than This


My 7 year old daughter loves her chapstick necklace!  She sometimes gets very chapped lips from licking them (a nervous tick) but never would be able to remember to use the chapstick we would send with her, in her backpack or pocket.  Having it conveniently hanging from around her neck made it much easier for her to remember.  Not to mention the "cool" factor of having a beautiful, one-of-a-kind necklace that none of the other little girls have.
After almost a year of hard, daily use she has finally just about worn her first necklace out and is very much looking forward to receiving her new necklaces that you custom made to her color requests.  That is very "cool" to me!  Thank you for a wonderful product that has truly made a positive difference in my daughter's quality of life.
Sincerely,  Doug R.

This wonderful dad contacted me almost a year later and said it's time for a new lip balm holder. When I asked for his daughter's favorite colors this is what I got: artwork! This makes it all worth doing.

These are going in the mail tomorrow.

They got there safe and she's very happy!

Thursday, March 15, 2012

Some Finished Stuff

 I made a flower lip balm holder for the spring.
 My sister whined for her own owl.
 I finished the bookmark gift...
it's sitting on a branch and attached to an egg.

Tuesday, December 6, 2011

Thursday, October 13, 2011

This Is Not An Easter Bunny

 He's just a bunny, bunny.
 See no basket!
 Just bunny cuteness.
With lip balm and a cotton tail.

Monday, April 4, 2011

Just Plain Fancy

 The more you work on something...
 ...the more you get out of it.


AND THEN IT BECOMES AN OBSESSION!

Saturday, March 26, 2011

Black Kitty Lip Balm Keychain

I think I have them figured out now, not perfectly but close enough.
 Gil was pleased with this one. 
 I promise to show you the small tubes next week!
 This one has a cute collar, not that kitties like collars.
This is what they all say, "take me home".

Friday, March 25, 2011

Lip Balm Keychain Cat

This was a week long exercise in learning. 
How do you make a round open head on top of your lip balm holder?
  How do you close the head afterward so you can't see inside?
 How do you make 5 tubes all the right diameters you need?
 How do you make pointy ears that look similar?

I think the biggest challenge was starting a tube. I had to figure out the technique for doing them. That's something I wouldn't mind showing you next.

Thursday, March 24, 2011

New Project

I ordered eyes in different sizes and colors and they came today. This guy is the first to receive a pair. He's a project I've been playing with for the past week.

A prototype for, what else, a lip balm holder. I'm not done yet, I've been working on legs and a tail. I used to think crocheting the rounds for a lip balm holder was challenging, now I'm needing to make tubes in 5 and 6 stitches only. Not easy, another lesson that took a while to master. Did I say master???

Friday, October 29, 2010

Chapstick Holder Tutorial

This is what you'll need: US F/3.75 hook and #3/light weight yarn.
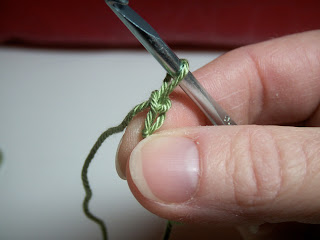
The start loop is the loop that you will crochet around to make a circle. Normally you would create a circle with a connected chain but this can leave a middle hole that's too big.
Chain 2
Single crochet into that first loop. All stitches in this project are single crochet.
First stitch.
Do 6 more for a total of 7.
The second row will be 2 stitches into every one stitch.
For a total of 14 stitches.
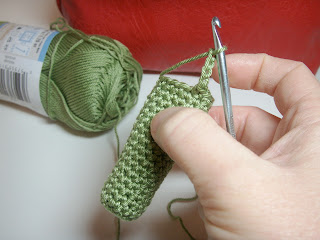
Next and each consecutive row will be 1 stitch into 1 stitch.
This makes it go up.
We're getting there.
It looks good, now we're ready for the chain.
You would stop here if making an embellishment. Make a loop and secure on the inside.
Continue for a necklace. You want the chain long enough to go over your head but not so long that it hangs too low on your front!
When your chain is long enough find the opposite side stitch and insert your hook through, inside out.
I make sure my chain is untwisted from the beginning before I pull the loop through.
Once my loop is pulled through, I cut my yarn leaving at least a 5 inch tail. Thread this through the loop.
Pull tight, like so.
Use a needle to knot on the inside.
All done!