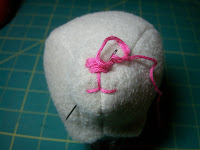
I just realized I should have 2 round headed pins on either side to show the width of my nose. I always eyeball it (maybe that's why my noses are crooked). Just like the felt nose we'll leave the end of our thread out. The next stitch should be just outside where we first went in.

I tend to feel my way through a nose. Sometimes they're triangle shaped, sometimes rectangles. If you'd like a specific nose you will want to make a template out of felt in the shape you want. Often when using a template you would stitch the perimeter with your embroidery floss and then fill the inside. I personally don't like the look of stitching around first. Probably another reason for my mess ups!

OK, I have a good shape going here.

Make sure your nose is completely filled in. Your last stitch will finish at the bottom of your mouth.

Same as yesterday, lift the stitches a bit at the bottom of your nose for your center line and out to the side.

Then out to the other side.
 Your last stitch completing the mouth goes back up. Try to come up under the stitches there by your first stitch. We want to hide that knot under those top stitches.
Gently double knot. This knot should tuck under the stitches at that top corner where you started and ended.
 Thread your needle again. Sewing under the top stitches, take one thread at a time, through the face.
 Holding the tension, cut the thread close to the fabric. The thread disappears.
Another cute nose!

No comments:
Post a Comment