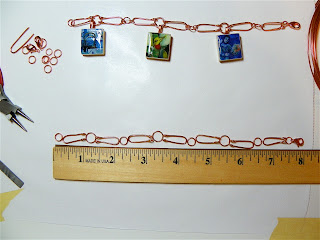
Begin by setting out your jump rings along the ruler. The basic bracelet size is 7" - 7 1/2". We're using the bracelet I made as an example. Next we're cutting 7 + 1 pieces of wire, 2" long.
I cut an extra for mess ups so I don't have to go back and do an old step.
File the ends of these wires so they don't catch on things.
I found my small paint brush to be the right size for bending my wire pieces on. Bend each in the center.
Make the loop touch.
Do the second end.
You can leave them like this or bend them back a bit like the above picture, it's up to you.
You'll notice that all our components stretch out to 8" but when it's put together it will be the size we want.
I've used smaller jump rings at the loop ends and bigger jump rings at our double ends. Slide the small jump rings into the loops, open the big jump rings with your flat nosed pliers and thread on your double ends. Be mindful of the fronts and the backs, you'd like them all going the same way.
Keep working across.
And in no time you're done!
This bracelet would be good for 1, 3, 5 or 7 charms.
Simple and pretty!


Wow! Thanks for that tutorial, you make it look easy!
ReplyDeleteYou are the tutorial queen, you have so much creativity!!!
Vicki