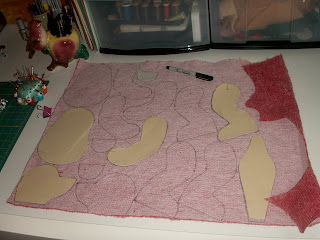
There are a couple of things I'd like you to notice:
#1 The gusset piece, at the bottom right, I leave a little longer at the bottom edge in case I need to make an adjustment to the head.
#2 Hopefully you can see that I marked where the arms and legs join to the body. These are just dots I marked through the pattern. When tracing 2 arms with the pattern up, only put a dot on 1. When tracing 2 arms with the reverse of the pattern only put a dot on 1. Sometimes you can see the dot through the fur on the side that you're not joining. When you put the pieces together you'll have your dots on the inside against the body only. You'll do the same for the legs. Sorry if your head is spinning but who wants their bear to have unnecessary marks!
I picked the body in this layout because it's not open at the top like the head which will need to be hand sewn and drawn closed. It also doesn't have darts, makes life sooo easy! I've even taken patterns and rounded them at the top or removed a hump that I didn't like. Feel free to modify patterns if you have the extra material to experiment with. Don't cut the original pattern though, make modifications on tracing paper and then tranfer that to a new piece of card stock. I'm gonna cut this guy out today.

No comments:
Post a Comment